Instructions for sending a small shipment
The following information is really meant for shipping one to a max of around 5 normal sized books, not large shipments. Also, this is NOT meant for slabbed books. For information about larger shipments or how to ship slabbed books, go to the bottom.
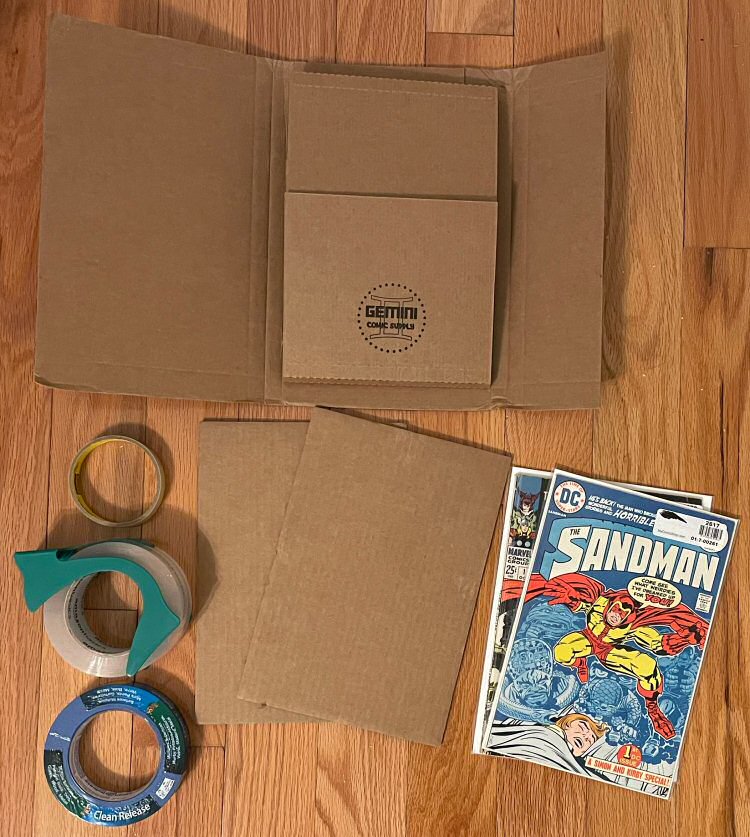
Gather everything on a nice flat surface...
...and roll up your sleeves
Materials required: Sturdy comic book mailer (in our opinion, Gemini II is the best), individually bagged and boarded comic book(s) to send (I'd say at most up to 5 regular sized books), 2 roughly identically sized rigid pieces of cardboard (slightly larger in both width and length than the book(s), but not too wide or long to cause issues with the limited space in the middle of the mailer), packing tape, painters tape. Masking tape is a great but granted, it is optional.
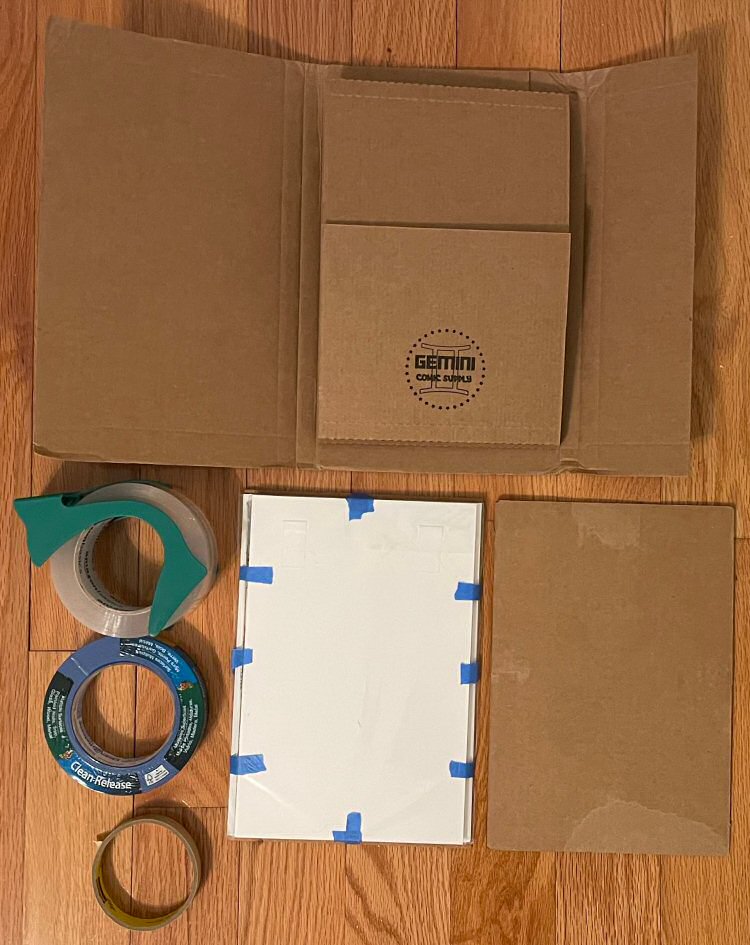
Start making the cardboard sandwich...
...yum yum
Get to work using the painters tape. In the example photo below we have 2 books, so we put them front cover to front cover (so their spines aren't touching) and taped them together on all four sides, then we put the books over top of one of the pieces of cardboard, centering it, and then used painters tape to secure them to the piece of cardboard (notice that you don't need to get crazy with the amount of painters tape). It's the same idea with multiple books, just alternate them so front covers face each other. For a single book, just tape it onto the middle of the piece of cardboard.
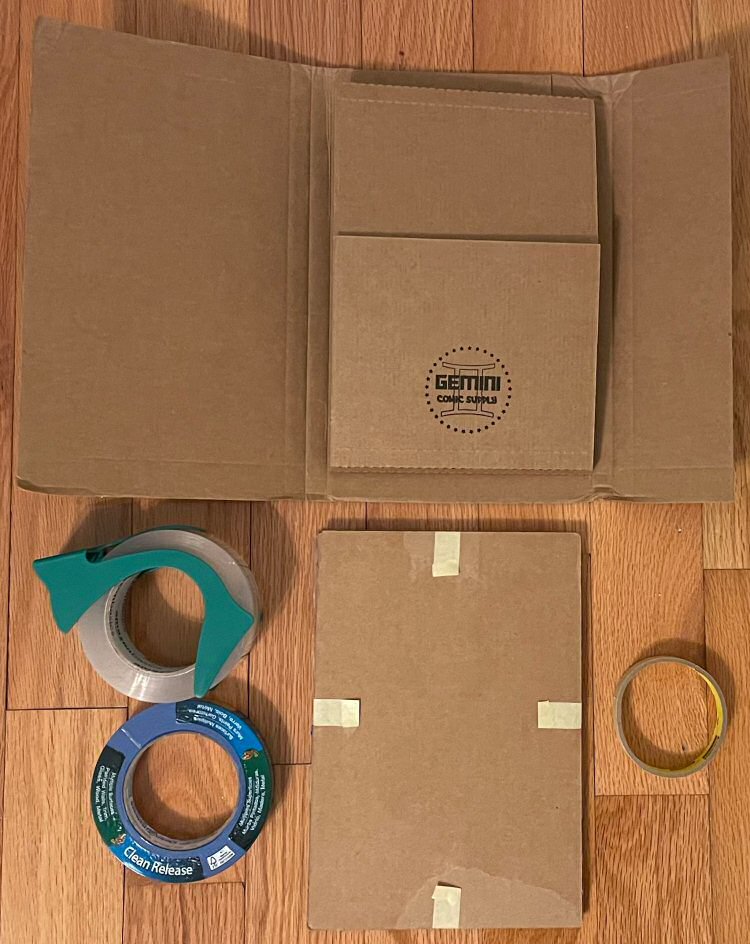
Finish the cardboard sandwich...
...cardboard sandwich complete
Lay the second piece of cardboard over top of the other one, aligning all 4 sides and then using masking tape (or you could certainly use painters tape or packing tape for this part instead) to secure all 4 sides. Our preference is to use masking tape for this. A nice touch is to double-back a little bit of one end, making a tab, so the recipient can easily pull away the tape to get at the book(s).
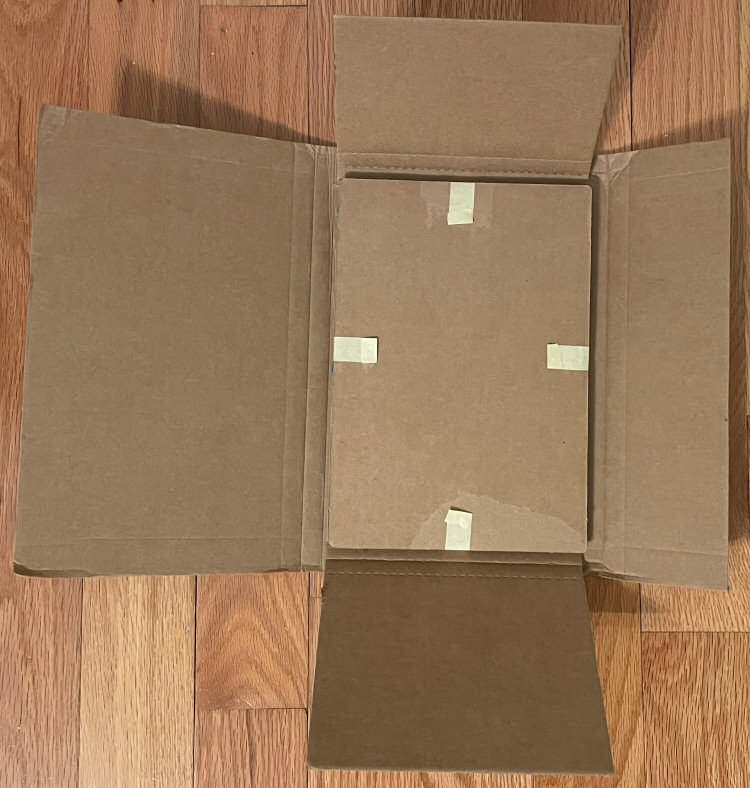
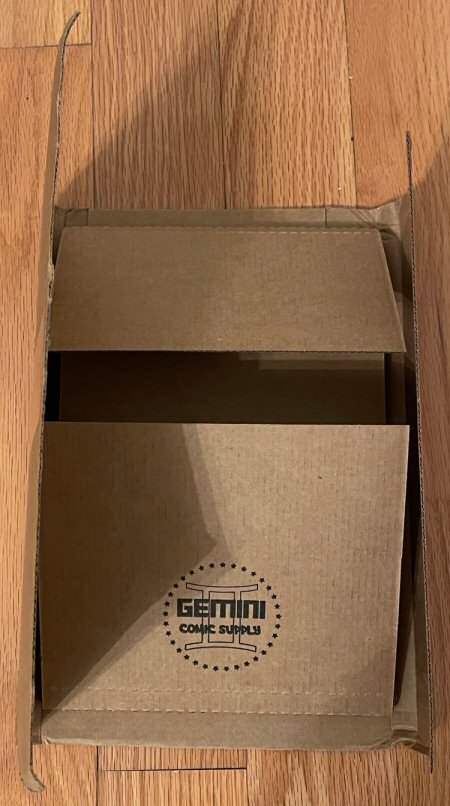
Insert cardboard sandwich inside the mailer...
...adjust flaps as necessary
Lay the cardboard sandwich inside the mailer, under the mailer's 2 built-in center flaps. Sometimes we will tape it down using whatever tape is handy. This isn't always necessary, so use your judgment. Both center flaps have perforation lines allowing you to expand/contract the height based on the size of the cardboard sandwich. Bend back the center flaps at the perforation lines as necessary.
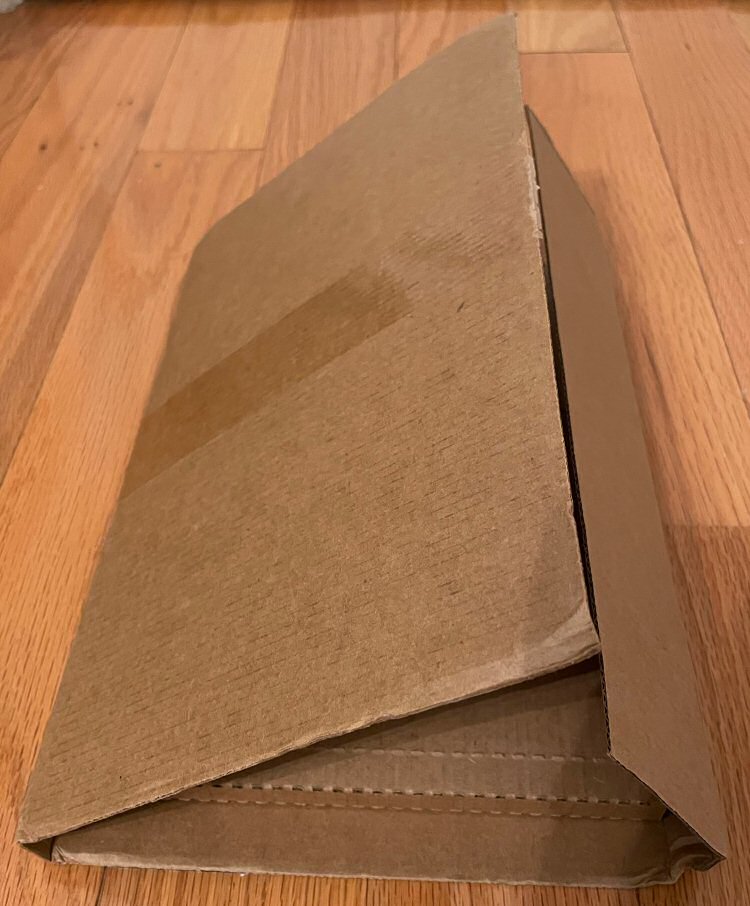
Start closing the mailer...
...closing...closing...
Close the mailer's 2 flaps (it's personal preference as to whether you want to tape the 2 center flaps together but we feel it's unecessary because everything tightens down on them anyway), then close the 2 side flaps over top. Both side flaps have a few bendable lines in order to properly fit the size of the cardboard sandwich. Bend the side flap(s) as necessary. Make sure everything is snug, but also not too tight. This is a personal preference, but we prefer to lay the shorter side flap over top of the longer side flap.
Finish closing the mailer...
...mailer closed, test for movement
We prefer to fold the shorter side flap over top of the longer side flap, as this gives you the advantage of being able to easily run a length of packing tape along the midpoint of the mailer on the seam and also wrap the tape to the underside, which adds to its security. But again, this is a matter of personal preference. Lightly jostle the mailer to listen or feel for any movement of the cardboard sandwich. A little movement should be fine, but it's not wise to have a lot of movement, so fix that by adjusting flaps.
Tape the mailer closed...
...ensure mailer is good to go
Run a long continuous piece of packing tape so that it starts a couple inches on the underside, then all along the seam of the side flaps, then again to the other underside a couple inches. Apply pressure all along the tape so it's firmly attached.

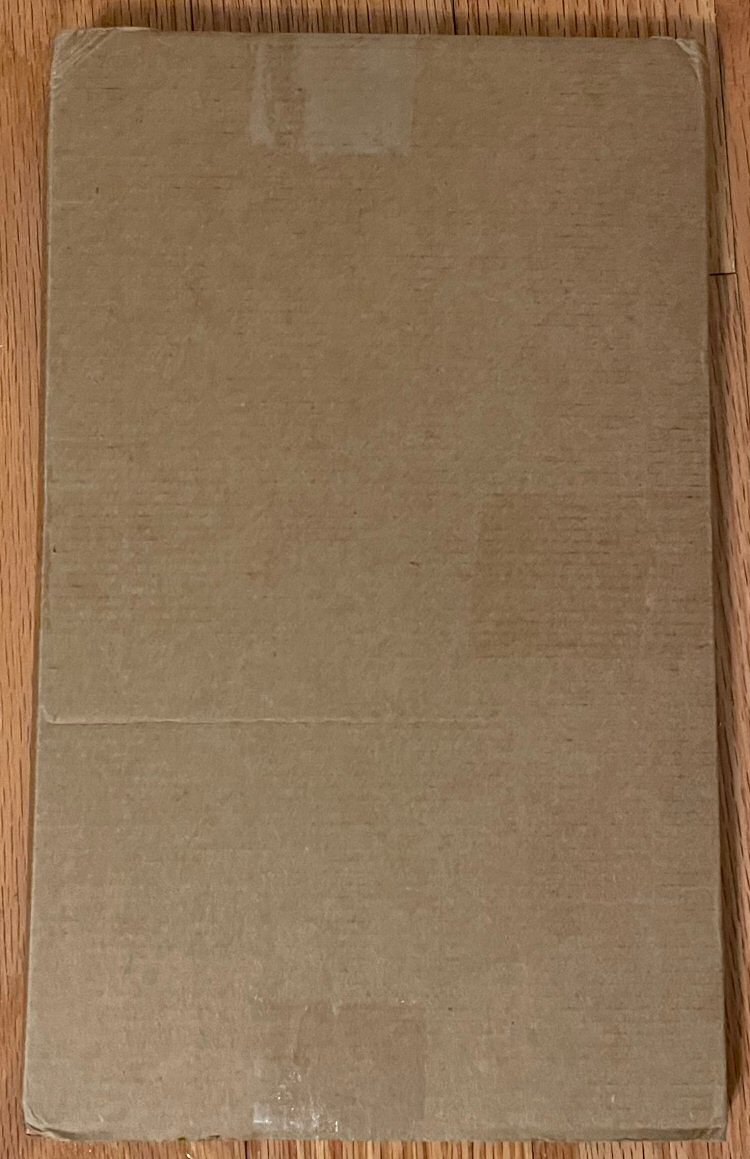
Flip over the mailer...
...prep for shipping label
Again, this is personal preference, but since the seam is at roughly the midpoint of the mailer, we prefer to flip over the mailer to prepare for attaching the shipping label.
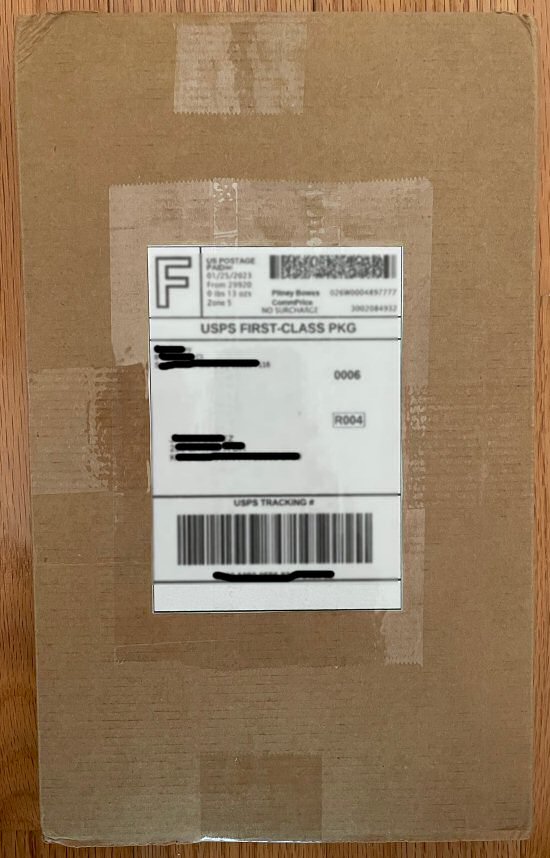
Attach the shipping label...
...remove any other labels, write "FRAGILE"
If you are going to drop this mailer off at a shipping carrier and get a shipping label there, then ignore the parts talking about obtaining a shipping label. Obviously ship how you wish, but we think Pirate Ship is fantastic way to obtain inexpensive shipping labels at home. But you do you...we don't own that company, and we don't get any kickbacks for sending people over there...we just simply find it to be a great way to print labels at home. Anyway, get a shipping label and put it in a location that makes sense. Feel free to just cover over any potential previous labels, or remove those prior to attaching your new label. Cover the entire shipping label with packing tape to secure it, unless you've printed a self-adhesive label. A nice touch is to write "FRAGILE" and/or "DO NOT BEND" with a black Sharpie on both sides of the mailer, or you can attach similar stickers. Make sure to remove from the outside of the mailer any stickers or other labels, such as UPCs, as they might throw off a shipping carrier. They can be real sticklers about this.
Give your package some wings!
...drop it off or have it picked up
That's it. Drop off the package or have it picked up. Remember to give us the tracking number.
What about big shipments or shipping slabbed books?
For maybe around 5 or so books or more, make good judgment calls on this. For larger shipments, ideally send multiple mailers inside a larger box, using packaging material such as bubble wrap to protect the mailers. Or make several cardboard sandwiches, putting several books together between cardboard, and again using bubble wrap or packing peanuts, etc.
For shipping slabbed books, ideally bubble wrap them individually, and place in a nice solid box.
Care and consideration
FIN
Some final thoughts... in regards to consideration for people who you are sending comic books to is to never put Scotch tape directly onto comic book bags or slabbed protective bags unless you make a tab (described earlier on this page) so the tape can be easily removed. But even so, Scotch tape on a comic book bag should only be done to tape down the back flap of the bag. It's really annoying to remove tape and have a bunch of tape residue left behind on the bag. Also, comic book bags and slabbed protective bags do NOT go together with packing tape. It's nuts how some people don't get this. Doing this can easily ruin a book, as the recipient tries to yank the bagged book away from the packing tape. Please do NOT do this. If you do this with book(s) you send to us, and damage ensues when we try to get at the book(s), that is not our responsibility.
Do NOT send us books in flat mailers or USPS flat envelope mailers, even if sandwiched between pieces of cardboard. We've seen many a book get destroyed when people do this nonsense. If you care enough about your books to have them cleaned and pressed, make sure to devote proper care to making sure they arrive to us undamaged after shipping.
Gosh what just happened? We were having such a fun, carefree, easy-going conversation. Ha. I guess we've just seen too much destruction due to careless or thoughtless handling of comic books. Okay, we're back to our normal freewheeling selves.